Arc Height

Arc height is an important skill to develop in the full swing and wedge game.  The reason is you can have good or poor technique but if you can control the Arc Height variable you can have a functional result.  This skill combined with the low point is also valuable in the full swing.

First let’s address what arc height is.  Arc Height is where the swing changes from going down on the circle to up.  That point is shown below at the black line.  I want to thank Adam Young Golf for the great graphics I got off his YouTube Channel. Also Click Here to go to his site and find out more info on The Strike Plan and NGL programs he offers.

Screen Shot 2019-03-16 at 3.13.43 PM.png

In the above image the correct height will collect the ball, brush the dirt in front, and start to change direction after the ball.  If that arc is lower like the lower arc above you will see that the impact where the star is moves back and the arc goes more into the ground.  Below is an iron strike off the grass.  The club first touches the blades of the grass at the furthest left arrow, continues down to the middle arrow, then comes above the blades of grass at the last arrow on the right.  In this scenario if the circle stayed consistent and the arc was moved 2″ lower the contact would enter further back and be traveling too far under the ball resulting in a heavy shot.

Screen Shot 2019-03-16 at 3.15.03 PM.png

Here is a visual of a club traveling too low.  Put the ball on a tee to see what would happen if there was no ground under the ball.  Imagine the ball is sitting on the ground and the ground is the black alignment rod.  In this scenario the club has came into first contact where the red arrow is then continues down to the bottom of the tee.  If there was actual ground here the club would crash into it and stop or bounce out.

Screen Shot 2019-03-16 at 3.15.52 PM.png

Below is an image of an arc height that is too high.  You can see that the leading edge of the club collided with the middle of the ball.  The causes the ball to go straight forward instead of letting the loft project the ball into the air.  Higher up than the equator then it will project the ball down into the ground.

Screen Shot 2019-03-16 at 3.10.59 PM.png

Here is a good arc height and low point control added together.you can see the club clipped the tee and was at the lowest point where the red arrow is at.  The club collided into the ball and was a center strike which projected the ball upwards.

Screen Shot 2019-03-16 at 3.17.51 PM.png

Now let’s look at a wedge.  If you can control how deep under the ball the club travels your low point can be at or around the ball as long as the club is not traveling down too steep and for too long.  A good drill for arc height control is to place the ball on a tee and have the tee 2-5mm above the turf.  The goal is to clip the tee and avoid the turf.  When you can do that move the ball onto the turf and have the same depth under the ball.

Here are 3 scenarios showing how depth control works in the short game area and having a wide margin of error is beneficial.  You can land the club a few inches behind the ball, at the ball, or slightly infront and have functional shots for all.  The launch, contact, and spin will all be different but results acceptable.

Scenario 1 Low point at the ball and good height control.  With this if you have the leading edge below the arc (too much shaft lean) the sharp edge will catch the ground and dig.  Also if you have too much bounce the back of the club can hit the ground and cause the leading edge to be turned into the ground and catch the leading edge.  Bounce effects how the club interacts with the turf so get fit!!

Screen Shot 2019-03-16 at 3.53.48 PM.png

Scenario 2 Low point behind the ball and good height control.  Club will slide across the ground and project the ball up.

Screen Shot 2019-03-16 at 3.57.19 PM.png

Scenario 3 Low point is in front of the ball and good height control.

Screen Shot 2019-03-16 at 3.57.40 PM.png

Can see the leading edge will travel below the equator in each scenario and project the ball upwards.

Arc Height Drill
Good Strike Clip
Arc Height too high, Thin Shot Clip
Arc Height too low, Fat Shot Clip
Thin/Fat are sometimes the same thing – Video
Good Low Point, matching bounce, proper shaft lean – Chipping off a tight lie video

Backswing Drill: Medicine Ball

Would like to share with you a good drill for the backswing.  This uses a medicine ball or weighted object to give you the feeling of what the body should be doing to move the weight or club back and through in a golf swing.  For the YouTube video link Click Here.

Step 1:  Put the weighted object in front of you with bent arms.  4-8 pounds is all you need.  The weight is there to give you a sensation not a workout.

Screen Shot 2019-03-16 at 4.22.30 PM.png

Step 2:  Turn the weight into your backswing.  As you can see I kept the weight in front of the chest and kept the arms in very similar positions as they were at setup.  It was moved back with the body.

Screen Shot 2019-03-16 at 4.22.21 PM.png

We do not want to see the hips sliding over the rail foot like below.  As you can see that just moves the weight side to side instead of in a circle.  Could do this with the body and pull my right elbow back but remember arms are trying to stay in the same position as setup.

Screen Shot 2019-03-16 at 4.22.43 PM.png

Step 3: From the backswing position rotate onto the lead foot and support the weight out in front of the body.  You will learn how to push the hips forward and keep the chest back to counter balance the weight as it is out in front of the lead foot.  Also notice the trail toe is in the ground and you can see the bottom of the shoe from down the line.

Screen Shot 2019-03-16 at 4.22.51 PM.png

This can also be done with a club out in front of you but will not give the weighted feel but can give you the rotation feel.  Also notice that I kept my right and left hands the same distance away from my shoulders.  In the backswing the shaft is tilted with the shoulders and the grip is pointing down to the ground.

Screen Shot 2019-03-16 at 4.23.18 PM.png

Screen Shot 2019-03-16 at 4.23.33 PM.png

Screen Shot 2019-03-16 at 4.23.36 PM.png


Shoes and Their Effects on Pressure Traces.

In this blog I wanted to cover shoes and their effect on your balance and pressure trace.  Pressure is what the ground is feeling under your body and everyone has a trace unique to them.  The reason for this post is I have been wearing some shoes that are comfortable to wear all day and teach in but was having issues on the course with balance and feels when playing with students.  Normal go to playing shoes for myself is a flat shoe with soft spikes.  If you are not a reader Click here for the YouTube video. Here are the findings hitting a few shots using BodiTrak with the shoes on and barefoot:

On the left photo you will see me with my shoes off and the right where they are on.  The shoes have a larger heel piece which creates a wedge under the feet and pushes the pressure more towards the toes.  Ball in the same spot and take a look at the difference.  Same amount of pressure form left to right but to to heel stands out.  The shoes pushed more of myself onto the toes which is felt in setup.

IMG_4214.jpg

These photos are taken when the pressure reached the maximum distance traveled to the right.  Notice without shoes more pressure went right and in to the heel with the trace being more linear instead of from the toes arcing to the trail heel.

IMG_4215.jpg

With the pressure moving more direct, without shoes and having to rebalance from too much getting on the lead toe, the pressure started to move sooner towards the target.  Notice how soon the pressure started to move around left arm parallel.  We see a lot of higher handicap golfers keep their pressure and even their weight moving away form the target for too long. Stills at P3 or Lead Arm Parallel to the Ground.

IMG_4216.jpg

Here we are at P6 or shaft parallel to the ground without the shoes on it is easier to get the trace to arc towards the lead heel.  I play a cut and that keeps the body turning in order to get the swing direction more left.  On the right with the shoes notice how the pressure is more mid foot.  This could have more of a neutral path and throughout the ground as the body gets tired if that becomes more toe bias the path can move in to out.  Not a good thing for curving the ball to the right.

IMG_4217.jpg

Here in the finish I noticed not only more pressure into the lead heel but with the shoes on it went into the heel then back to mid foot with the shoe design.  Also notice that in both scenarios more pressure finished towards the target (90% and 83%) with more towards the lead heel.

IMG_4218.jpg

You may be asking what can be learned form this little test?  I would say pick your shoes carefully and this will be all player dependent.  If you are a golfer that gets too much on their heels at setup a higher back of the shoe will help you stay more centered or towards the toes.  Also if you’re a slicer that gets too much on the lead heel at impact they could again help you get the pressure trace going more linear or towards your toes.

If you are a player that likes to fade the ball a more neutral shoe will help get the pressure moving more into the lead heel.  If your path is moving too much left a little heel lift might help.

Also what is on the bottom will change your foot work.  From a spiked shoe to a soft spike will change the amount of grip the feet have.  Some players, especially those with limited mobility, might benefit form shoes that will break traction through the shot and let their lead foot move.

To summarize all of this try a few shoes on.  When making a selection make a few golf swings between different styles.  See what one you are more balanced in form setup to backswing and into the finish.  If your local club has a BodiTrak, Swing Catalyst, or another pressure mat then take a few swings on it.  That will give you the feedback on if a lifted heel or flat heel is best for you, what the shoe is made out of from stiffer outer to softer, and what traction the shoe has.  Finding the right shoe could also increase your club speed where the poorly fit shoe can reduce the speed.

Here is an unclose view of the traces.  Shoes off on top and with heel lifted shoes on the bottom.IMG_4220.JPG

Here is a YouTube video with a good drill to get you the feeling of a balanced setup and where your pressure is going during the swing.

Attack Angle

This article is mostly going to cover attack angle on a stock mid range wedge.  For the YouTube clip Click Here.  In the wedge game you can get away with a low point in front of the ball, at the ball, or slightly behind which would be a club landing slightly behind the ball.  That is as long as the club is coming down like an airplane that is going to do a touch and go instead of one that is too steep and would crash.  For a stock shot it is good to have an attack angle from 4-10*.  The reason for this is to reduce the amount of interference between ball and club.  Also when you are in the rough the steeper attack angle will not have to go through as much grass as a shallower club.  Less interference will help create more friction, launch the ball lower, and increase the spin on a stock shot.

Now let’s take a look at a drill that will give you instant feedback.  Place a golf ball 1 grip behind the ball you are going to strike.  The goal is to land the club in a manner that the club will miss the back ball and not dig into the ground.  Sounds easier than it is if you are someone that has a tendency to want to try to help the ball in the air.

Below on the left is a successful attempt and the one on the right was not.  At shaft parallel to the ground you will notice that the butt of the club is closer to being over the ball on the left.  That is setting up the steepness needed.  When doing this drill or hitting my stock shot I feel as if I am going to miss the ball 2-3″ in front of the ball.

Screen Shot 2019-03-17 at 6.51.51 PM.png

As the club starts to release to be shallow through the turf strike the handle is now in front of the ball.

Screen Shot 2019-03-17 at 6.52.26 PM.png

Drawing a circle around that point you will see that the low point, where the yellow line is, varies.  On the left it is in front of the ball and on the right it is slightly behind.  If the back ball was not there I might have gotten away with the right shot.  The more grass behind the ball would have shown the club down more and more as well as reducing the amount of speed transferred to the ball.

Screen Shot 2019-03-17 at 6.56.16 PM.png

On the left the club is slightly pass the yellow line, or low point, and starting to travel slightly up.  The orange arrow is from where the ball started and where it is going.  You can see that on the left side of the circle the club was still traveling down and through.  A lot of golfers do not understand this and they want to try and help the ball in the air not trusting the club to do the work.

Screen Shot 2019-03-17 at 6.57.15 PM.png

Outside of shorter wedge shots we are looking for the left image more consistently.  The reason is that on the right the ball will be deflected too high and not out enough.  The right photo with the club arriving more vertical at the ball gets into high technique where the club actually lands behind the ball, projects it more upwards, and uses the landing angle to stop the ball instead of spin.

Also remember to change your wedges when needed, play a premium ball, and keep the grooves clean, and club face dry in order to create as much friction as possible.  I tell a lot of students that play Vokey wedges to replace their main wedge when each new model comes out which is roughly 2 years.  Their other wedges could be done every 2 cycles or 4 years or sooner if needed.

For the YouTube clip Click Here.

Lead Arm in the Downswing

Let’s talk about the downswing and your lead arm.  A good reference point is to have the lead arm inside the target line around 20* at lead arm parallel (P5) in the downswing.  Little more inward could help be more of a draw pattern where more outward could help with a cut pattern.  Here is a good drill to give you a visual and feeling. YouTube Link

If you don’t have someone to hold an allotment rod or club just outside your trail shoulder use a shaft with an alignment rod in it or two alignment rods taped together.  When using the alignment rods place the rod outside the ball line and have it go through your trail shoulder like on the featured image above.

Now that you know how to set it up let’s take a look at what it does.  If your lead arm moves out too fast it will run into the stick.  The alignment rod also gives you a spacial reference of where the lead arm and hands have room to operate.  Start off with small shots and success then speed up the swing.  Below is an image keeping the lead arm in on the left and one where the lead arm worked out too fast on the right.

screen shot 2019-01-15 at 4.37.42 pm

Click here for the YouTube Link or copy and paste this link in a browser window:  https://youtu.be/JxdhnZSRqEA


Start Line and Curve

Lets talk about start line and curve. The club face accounts for roughly 75% of the balls starting direction and the path curves it. In the featured image above is a great setup station. 10′ of rope starting a foot out in front of the ball with an alignment rod sticking up out the other end. The rope is lined up with the target and standing behind the ball the alignment rod is right in front of the target. Now from here you can get a visual of where the ball is starting and going. Here are the ball flights that could come out with a solid struck ball:

1. Ball starting left and craving left : Face closed to target and path more toward target.
2. Ball starting left and going straight : Face closed to target and path matching face start line.
3. Ball starting left and curving right towards or past the target : Face closed to path and swing direction left of the face.
3. Ball starting at the stick and curving left : Face square and swing more to the right.
4. Ball starting at the stick and curving right : Face square and swing more to the left.
5. Ball starting straight and going straight : Face and path straight. I call this the UNICORN.. Will discuss below.
6. Ball starting right and curving left : Face is open to the target and path is moving more right.
7. Ball starting right and going straight : Face is open to the target and path is going the same direction.
8. Ball starting right and curving right : Face is open to the target and path is moving more left than the face is open.

It is good to understand these ball flights when diagnosing your swing. That way when you are working on corrections you are not doing something that is going to make it move the same direction but worse. An example is a ball that starts left and curves right. You see that so figure lets aim more left. That just moves the path more left making more curve. The larger the difference is where the face was pointing at impact and the direction the club was traveling the bigger the curve.

Best training tool to add to your golf bag is a can of Dr. Scholls “POWDER” foot spray.  Why is this?  Because miss hits can change those above impact perimeters.  A club that is open to the target, swing direction slightly right of that (draw shape), and is hit in the heel of the club will not curve back but if it is hit in the toe the ball with over draw.  Same with the opposite club delivery of a cut.  Club face more left of the target at the strike point starting the ball left with a swing shape slightly more left of that but if you hit it in the heel the ball will over cut and if you catch it more on the toe the ball will fly straighter.  Also lower strikes launch lower and spin more and higher strikes launch higher and spin less.
Screen Shot 2019-01-11 at 8.19.47 PM.png

Use the above ball flights and strike info to figure out how to change your curve, reduce the curve. or know why your curve does what it does.  Remember I mentioned the UNICORN above which is a dead straight shot.  That is the hardest shot in golf because the face can be straight but the path slightly right or left and you get different curves.  We want some room for error built in the swing and a ball that is moving back towards the target.  Let’s take a draw as an example:  The photo below I am holding my club on the ball line or target line.   The furthest alignment rod to your right (my left) would be the club path at impact.  A good number would be 3-4* to the right.  That would give me room to fit my club face into that area and have a face from 1-3*.  On a swing direction of 3* right having my club face at 1* right would start right and slightly over draw just a little, a 2 would start right and finish close to the target line, a 3 would start right and go straight with the swing direction.  All very manageable shots with not much curve.  If my face was a 1 but swing was an 8 one way or another the ball would start close to the target then curve a lot past the target and work away from it as it landed.

Screen Shot 2019-01-11 at 8.28.41 PM.png

For more info and to see the YouTube clip on this subject CLICK HERE, select the above image, or go here: https://youtu.be/4JQLOgGJipo

Swing Direction Plus Launch Angle with Driver

Want to cover two topics here.  The first topic is Swing Direction.  Here is the YouTube Video.  In the above video I placed an alignment on the ball line a driver distance behind and in front matching the shaft plane.  The goal is to give you the ability to get the club to travel from under the one behind and over the one in front, over the one behind and under in front, or under and under.  With this you can get feedback where the club is coming from and going to.  Below I am showing a swing direction that could go under and over.

screen shot 2019-01-15 at 4.53.13 pm

Now let’s chat about swing direction and attack angle.  As a golfer it is hard to have a swing that is going out to in to and an upward attack angle so as we get the swing more from under to over there is a better chance.  Here is another drill to keep the swing coming from the inside and now get the attack angle under control.  I placed an alignment rod on the target line at an angle that put it a grip above the ball and rolled up a towel and placed that a foot in front off the ball.

Screen Shot 2019-01-15 at 4.54.32 PM.png

This will set up a path that the club can come from inside low and go above the ball.  See the below images showing this movement.  I hit some balls with this setup and it got the path right 6-8* and attack up 3-5*.  Great way to maximize your driver for the most distance.  With solid strikes it will produce a high launching low spinning ball.  Click Here for the YouTube video.

Screen Shot 2019-01-15 at 5.12.59 PM.png

Use these videos and drills to help get your swing shape where you want it and get that driver maximized.

Over Under Video Video: https://youtu.be/f5sIiQz5Eiw

Driver Attack Angle Video: https://youtu.be/0v_oHpB_i2c

Hip Tilts in the Golf Swing

The hips do not turn level in the golf swing.  Good players have their hips tilt in the backswing.  The reason for this is as the golfer is turning the trail leg loses flex and gets longer and the lead leg gains flex and gets shorter.  This causes the hips to tilt in the backswing.

To illustrate this I put an alignment rod through my front belt loops and you can see with the right leg longer then the left it creates a side tilt.  Using 3D gathering systems like Gears Gears Sports or 4DMotion we see the best players with a tilt between 5-20* depending on the player and club being used. 4DMotion is a great option to get a sensor or two and get feedback from your swing.

Screen Shot 2019-01-07 at 7.09.15 PM.png

Now the question becomes how long do the hips stay tilted in the downswing?  Into lead arm parallel on the downswing the pelvis loses a few degrees but still are tilted between 8* and 15* for a mid iron.  Lead arm parallel is the point that the vertical force on the lead foot spikes and the hips start to rise.  We see the hips level out between lead arm parallel and shaft parallel.  Here is an image from Gears showing the the level position for this player.  After this the lead hip gets higher all the way to the finish.Screen Shot 2019-01-07 at 7.24.03 PM.png

Below are 2 images.  First image on the left is where I pushed my hips forward fast which caused my head to go back and the left hip to get high.  The second image on the right I was falling more into the left leg before pushing off the gourd.  Was doing a drill covered HERE in this YouTube clip working on getting the alignment rod between the belt loops to contact the alignment rod in the ground behind me in the white area before impact.  Left photo was a thin shot where the club landed slightly behind the ball due to tilting back and the right photo was a solid strike with ball then turf.Screen Shot 2019-01-07 at 7.16.32 PM.png

How can you train this?  One option would be to place an alignment rod between your belt loops and at the top of the swing have it point towards the ground around 5′ in front of you.  You could put an alignment rod on the ground outside the ball as a reference point.  Another option is covered in the below image and in THIS YouTube clip.  Using a 6-10′ string around an alignment rod or something down at the ground you can hold one side on your left hip and the other on your right.  As you turn your trail hip back it will pull your lead hip forward.  Can do this holding it in your hands as well and give you the feel for tilting the shoulders on top of the tilted hips.Screen Shot 2019-01-07 at 7.36.47 PM.pngScreen Shot 2019-01-07 at 7.37.16 PM.png

YouTube Links:
Alignment Rod Drill – https://youtu.be/WT6ZxqzbpQw
Rope Drill – https://youtu.be/91eUAH1sCsg

Elbow Plane Line

Let’s talk about the Elbow Plane Line (Click for YouTube Video).  This line is not the fix all line but is a good reference point.  If you are looking for exact you will need to line up your camera in the correct spot where the camera is hand height and perpendicular to the target line.  I use it as a good enough line because my preference is to film at chest high just in front of the toe line.

Let’s take a look how I add the line.  You can see in the above photo how I take the swing to impact then draw a line up form the hosel and out the back of the shaft.  The reason for impact shaft line is the shaft rises from setup and the dynamic movements of the swing.  When taken back to setup the line roughly goes through the right elbow (7iron pictured).  I tend to have low hands at setup and always working on getting them higher and when focusing on it feel like they are on this line.  Looks like I need to work on some setup pieces.

Screen Shot 2019-01-15 at 6.48.27 PM.png
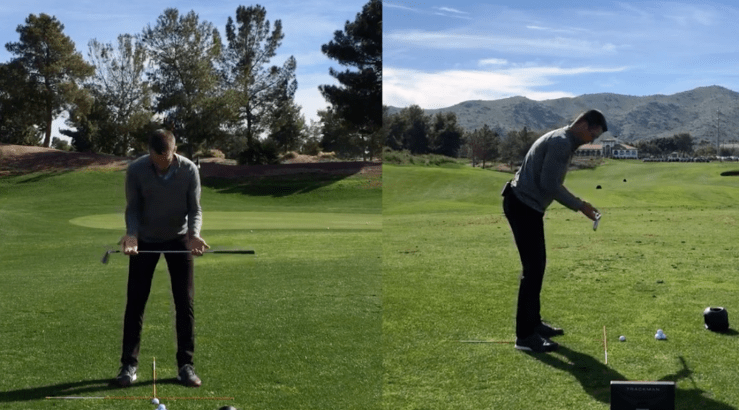
This is a general reference line that we can use to see if the club from the top is working towards the line or away form the line.  Below photo I added a dot to where the club head was at the top of the swing then where it went to in transition.  The left photo moved towards the line and down where the right moved away and across the ball. screen shot 2019-01-15 at 6.29.22 pm

Here they are at at P6 or shaft parallel.  Left going down the line and right staying above.Screen Shot 2019-01-15 at 6.44.30 PM.png

Here is just after impact you can see the club stay on the line on the left and the right where it came from above it went left and under the line.Screen Shot 2019-01-15 at 6.46.08 PM.png

A club that is traveling more along the line will usually have a stronger impact than one that is working too much form under or above.  Those clubs will be producing more of a glancing blow.

For the direct link to the YouTube channel click below:

Rotate to Balance

Balance is key in golf.  Turn on the tv and you will not see players moving all over the place, falling forward, back, and around at the finish.  The reason for this is it keeps the swing direction and impact more predictable.  If you are falling back that can move the swing direction more left and land the club too far behind the ball.  Click Here for the YouTube clip on this blog.

Here is a good drill I learned from Martin Chuck at the TourStriker Academy located at the Raven in Phoenix, AZ.  Place your club across your thigh and put some pressure into both legs.  Keep this pressure constant into the finish.  See the above photo for the start and finish.

In the below are to finishes for comparison.  The left photo we see often with the golfer finishing with too much pressure on their trail foot.  This keeps the center over the ball and the low point back too far.  What we want to see if on the right.  The golfer is standing on their left foot, 95% of their pressure is on the target side of the ball line, and there is just enough pressure on the back foot so they don’t fall over.  Can also see that the back of the rear is on the ball line.  This is a good check point to hold and assess where you are, how it feels, and how it looks.

screen shot 2019-01-15 at 7.06.29 pm

Start small and grow your swing.  For the YouTube video direct link click below: